[ad_1]
使用 Vagrant 搭建开发环境
在本教程中,我们将演示如何在多个操作系统上安装 Vagrant。
什么是流浪者?
Vagrant 是一种用于在单个工作流中管理虚拟化和虚拟机的工具。 我们可以将其描述为 KVM 等管理程序的包装器, VirtualBox,或 VMWare。 这允许团队在专用服务器生产环境上创建应用程序时使用相同的开发环境。 然后我们可以简单地与同一平台上的其他人共享流浪文件。
流浪安装
在以下部分中,我们将介绍 Vagrant 的安装:
- 视窗 10
- Linux CentOS 7
- 苹果系统
无论操作系统类型如何,我们都可以将 vagrant 与任何管理程序一起使用,但对于我们的用例,我们将使用 Vagrant 与 VirtualBox.
视窗安装
要求
- 适用于 Windows 的 Git
- VirtualBox
- 流浪汉
为 Windows 安装 Git
要在我们的 Windows 服务器上安装 vagrant,我们需要 安装适用于 Windows 的 Git 从这个链接。
我们将通过单击 windows 图标下载 windows 所需的 .exe 文件。 安装 Git 后,很多选项可以保留为默认值,但是我们需要付出代价 close 注意以下选项。
- Git 来自命令行,也来自 3rd-party 软件
- 使用 OpenSSL 库
- 按原样结帐,提交 Unix 样式的行结尾
- 使用 MinTTY
Git安装完成后,我们可以继续下载安装 VirtualBox 用作我们的管理程序。
安装 VirtualBox 在 Windows 上
我们在教程的开头提到 Vagrant 充当我们管理程序的包装器。 接下来,我们需要 安装管理程序 从这个链接。
- 从上面的链接下载虚拟盒子。
- 按照下图安装
- 单击 Windows 主机开始下载。
- 安装开始后,我们可以保留所有默认选项。
一旦 VirtualBox 安装已经完成,我们需要安装 Vagrant 作为最后一个组件,才能开始在我们的 Windows 服务器上使用它。
在 Windows 上安装 Vagrant
要使用 Vagrant,我们需要一个版本 安装了流浪汉 在我们的 Windows 服务器上。 我们可以在这里下载。
- 单击上面的链接,然后下载 2.2.7 版。
- 根据您的服务器类型选择 Windows 32 位或 64 位版本。
- 下载完成后,双击 .exe 文件开始安装,然后按照以下说明进行操作。
单击下一步按钮继续。

同意许可,然后单击下一步。
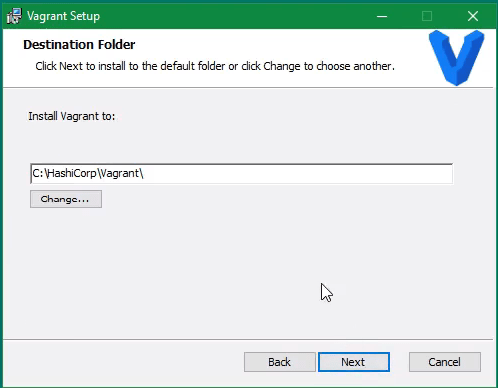
选择安装文件夹,然后单击下一步。
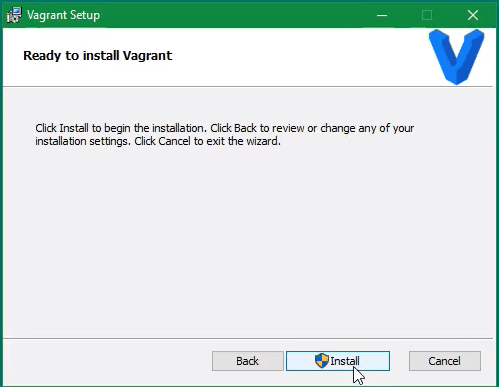
现在我们准备完成安装。 单击安装按钮继续。
安装 Vagrant 后,我们需要重新启动 Windows 以应用更改。 安装完成后,我们可以开始在 Windows 计算机上使用 Vagrant。
Linux 安装
在本教程的这一部分,我们将在 CentOS 7 服务器上安装 Vagrant。 基本上,我们有几种可用的选择,但在这种情况下,我们将采取一些不同的方法 安装 Vagrant 使用此链接中的官方 RPM 包。
在 CentOS 7 上安装 Vagrant
- 登录到您的 Linux CentOS 工作站并打开终端。
- 使用以下命令检查 CentOS 的版本
[[email protected] ~] cat /etc/*release
CentOS Linux release 7.7.1908 (Core)
首先,我们将通过运行以下命令来确保我们所有现有的软件都是最新的。
[email protected] [~]# yum update接下来,我们将更改 /tmp 文件夹中的目录,然后使用 wget 命令将 RPM 文件下载到该目录。
[email protected] [~]# cd /tmp
[[email protected] tmp]# wget https://releases.hashicorp.com/vagrant/2.2.7/vagrant_2.2.7_x86_64.rpm
--2020-02-25 07:49:37-- https://releases.hashicorp.com/vagrant/2.2.7/vagrant_2.2.7_x86_64.rpm
Resolving releases.hashicorp.com (releases.hashicorp.com)... 151.101.249.183, 2a04:4e42:3b::439
Connecting to releases.hashicorp.com (releases.hashicorp.com)|151.101.249.183|:443... connected.
HTTP request sent, awaiting response... 200 OK
Length: 42576773 (41M) [application/x-redhat-package-manager]

Saving to: 'vagrant_2.2.7_x86_64.rpm'
100%[=====================================================================>] 42,576,773 23.8MB/s in 1.7s

2020-02-25 07:49:39 (23.8 MB/s) - 'vagrant_2.2.7_x86_64.rpm' saved [42576773/42576773]
为确保文件未被篡改,我们将获取文件的校验和并根据 HashiCorp 的公钥对其进行验证。
(该方法基于 Vagrant 定义的安全策略)
[[email protected] tmp] wget https://releases.hashicorp.com/vagrant/2.2.7/vagrant_2.2.7_SHA256SUMS.sig
--2020-02-25 07:53:21-- https://releases.hashicorp.com/vagrant/2.2.7/vagrant_2.2.7_SHA256SUMS.sig
Resolving releases.hashicorp.com (releases.hashicorp.com)... 151.101.249.183, 2a04:4e42:3b::439
Connecting to releases.hashicorp.com (releases.hashicorp.com)|151.101.249.183|:443... connected.
HTTP request sent, awaiting response... 200 OK
Length: 310 [application/octet-stream]
Saving to: 'vagrant_2.2.7_SHA256SUMS.sig'

100%[===============================================================>] 310 --.-K/s in 0s

2020-02-25 07:53:21 (53.7 MB/s) - 'vagrant_2.2.7_SHA256SUMS.sig' saved [310/310]
wget https://releases.hashicorp.com/vagrant/2.2.7/vagrant_2.2.7_SHA256SUMS
--2020-02-25 07:54:02-- https://releases.hashicorp.com/vagrant/2.2.7/vagrant_2.2.7_SHA256SUMS
Resolving releases.hashicorp.com (releases.hashicorp.com)... 151.101.249.183, 2a04:4e42:2f::439
Connecting to releases.hashicorp.com (releases.hashicorp.com)|151.101.249.183|:443... connected.
HTTP request sent, awaiting response... 200 OK
Length: 727 [text/plain]
Saving to: 'vagrant_2.2.7_SHA256SUMS'
100%[===============================================================>] 727 --.-K/s in 0s
2020-02-25 07:54:03 (173 MB/s) - 'vagrant_2.2.7_SHA256SUMS' saved [727/727]接下来,我们将创建一个名为 hashicorp.asc 的文件,并使用 echo 命令将以下信息插入到该文件中。
[[email protected] tmp]# echo
‘-----BEGIN PGP PUBLIC KEY BLOCK-----
Version: GnuPG v1
mQENBFMORM0BCADBRyKO1MhCirazOSVwcfTr1xUxjPvfxD3hjUwHtjsOy/bT6p9f
W2mRPfwnq2JB5As+paL3UGDsSRDnK9KAxQb0NNF4+eVhr/EJ18s3wwXXDMjpIifq
fIm2WyH3G+aRLTLPIpscUNKDyxFOUbsmgXAmJ46Re1fn8uKxKRHbfa39aeuEYWFA
3drdL1WoUngvED7f+RnKBK2G6ZEpO+LDovQk19xGjiMTtPJrjMjZJ3QXqPvx5wca
KSZLr4lMTuoTI/ZXyZy5bD4tShiZz6KcyX27cD70q2iRcEZ0poLKHyEIDAi3TM5k
SwbbWBFd5RNPOR0qzrb/0p9ksKK48IIfH2FvABEBAAG0K0hhc2hpQ29ycCBTZWN1
cml0eSA8c2VjdXJpdHlAaGFzaGljb3JwLmNvbT6JATgEEwECACIFAlMORM0CGwMG
CwkIBwMCBhUIAgkKCwQWAgMBAh4BAheAAAoJEFGFLYc0j/xMyWIIAIPhcVqiQ59n
Jc07gjUX0SWBJAxEG1lKxfzS4Xp+57h2xxTpdotGQ1fZwsihaIqow337YHQI3q0i
SqV534Ms+j/tU7X8sq11xFJIeEVG8PASRCwmryUwghFKPlHETQ8jJ+Y8+1asRydi
psP3B/5Mjhqv/uOK+Vy3zAyIpyDOMtIpOVfjSpCplVRdtSTFWBu9Em7j5I2HMn1w
sJZnJgXKpybpibGiiTtmnFLOwibmprSu04rsnP4ncdC2XRD4wIjoyA+4PKgX3sCO
klEzKryWYBmLkJOMDdo52LttP3279s7XrkLEE7ia0fXa2c12EQ0f0DQ1tGUvyVEW
WmJVccm5bq25AQ0EUw5EzQEIANaPUY04/g7AmYkOMjaCZ6iTp9hB5Rsj/4ee/ln9
wArzRO9+3eejLWh53FoN1rO+su7tiXJA5YAzVy6tuolrqjM8DBztPxdLBbEi4V+j
2tK0dATdBQBHEh3OJApO2UBtcjaZBT31zrG9K55D+CrcgIVEHAKY8Cb4kLBkb5wM
skn+DrASKU0BNIV1qRsxfiUdQHZfSqtp004nrql1lbFMLFEuiY8FZrkkQ9qduixo
mTT6f34/oiY+Jam3zCK7RDN/OjuWheIPGj/Qbx9JuNiwgX6yRj7OE1tjUx6d8g9y
0H1fmLJbb3WZZbuuGFnK6qrE3bGeY8+AWaJAZ37wpWh1p0cAEQEAAYkBHwQYAQIA
CQUCUw5EzQIbDAAKCRBRhS2HNI/8TJntCAClU7TOO/X053eKF1jqNW4A1qpxctVc
z8eTcY8Om5O4f6a/rfxfNFKn9Qyja/OG1xWNobETy7MiMXYjaa8uUx5iFy6kMVaP
0BXJ59NLZjMARGw6lVTYDTIvzqqqwLxgliSDfSnqUhubGwvykANPO+93BBx89MRG
unNoYGXtPlhNFrAsB1VR8+EyKLv2HQtGCPSFBhrjuzH3gxGibNDDdFQLxxuJWepJ
EK1UbTS4ms0NgZ2Uknqn1WRU1Ki7rE4sTy68iZtWpKQXZEJa0IGnuI2sSINGcXCJ
oEIgXTMyCILo34Fa/C6VCm2WBgz9zZO8/rHIiQm1J5zqz0DrDwKBUM9C
=LYpS
-----END PGP PUBLIC KEY BLOCK-----’
>> hashicorp.asc
现在,我们可以导入我们的密钥。
[[email protected] tmp]# gpg --import hashicorp.asc
gpg: key 348FFC4C: public key "HashiCorp Security <[email protected]>" imported
gpg: Total number processed: 1
gpg:               imported: 1  (RSA: 1)
接下来,我们可以使用以下命令验证签名。
[[email protected] tmp]# gpg --verify vagrant_2.2.7_SHA256SUMS.sig vagrant_2.2.7_SHA256SUMS
gpg: Signature made Tue 28 Jan 2020 04:09:52 PM EST using RSA key ID 348FFC4C
gpg: Good signature from "HashiCorp Security <[email protected]>"
gpg: WARNING: This key is not certified with a trusted signature!
gpg:          There is no indication that the signature belongs to the owner.
Primary key fingerprint: 91A6 E7F8 5D05 C656 30BE  F189 5185 2D87 348F FC4C
在此之后,我们应该验证下载。
[[email protected] tmp]# rpm --checksig vagrant_2.2.7_x86_64.rpm
vagrant_2.2.7_x86_64.rpm: sha1 md5 OK
现在我们可以安装 Vagrant。
[[email protected] tmp]yum install vagrant_2.2.7_x86_64.rpm
Loaded plugins: fastestmirror, priorities, universal-hooks
Examining vagrant_2.2.7_x86_64.rpm: 1:vagrant-2.2.7-1.x86_64
Marking vagrant_2.2.7_x86_64.rpm to be installed
Resolving Dependencies
--> Running transaction check
---> Package vagrant.x86_64 1:2.2.7-1 will be installed
--> Finished Dependency Resolution
Dependencies Resolved
=================================================================================== Package Arch Version Repository Size ===================================================================================Installing:
Vagrant x86_64 1:2.2.7-1 /vagrant_2.2.7_x86_64 118 M

Transaction Summary
===================================================================================Install 1 Package
Total size: 118 M
Installed size: 118 M
Is this ok [y/d/N]: y
Downloading packages:
Running transaction check
Running transaction test
Transaction test succeeded
Running transaction
Installing : 1:vagrant-2.2.7-1.x86_64 1/1
Verifying : 1:vagrant-2.2.7-1.x86_64 1/1

Installed:
vagrant.x86_64 1:2.2.7-1

Complete!
为了确认 Vagrant 已正确安装,我们可以使用以下命令检查版本。
[[email protected] tmp] vagrant --version
Vagrant 2.2.7
安装 VirtualBox 在 CentOS 7 上
要使用 Vagrant,我们需要安装 VirtualBox 在我们的 Linux 服务器上也是如此。 我们可以按照下面提到的步骤完成此操作。
下载 VirtualBox RPM 使用以下命令。
[[email protected] tmp] wget https://download.virtualbox.org/virtualbox/6.1.4/VirtualBox-6.1-6.1.4_136177_el7-1.x86_64.rpm
--2020-02-25 08:26:49-- https://download.virtualbox.org/virtualbox/6.1.4/VirtualBox-6.1-6.1.4_136177_el7-1.x86_64.rpm
Resolving download.virtualbox.org (download.virtualbox.org)... 104.114.160.115
Connecting to download.virtualbox.org (download.virtualbox.org)|104.114.160.115|:443... connected.
HTTP request sent, awaiting response... 200 OK
Length: 106299620 (101M) [application/x-redhat-package-manager]
Saving to: 'VirtualBox-6.1-6.1.4_136177_el7-1.x86_64.rpm'
100%[==============================================================>] 106,299,620 16.3MB/s in 8.0s

2020-02-25 08:26:58 (12.7 MB/s) - 'VirtualBox-6.1-6.1.4_136177_el7-1.x86_64.rpm' saved [106299620/106299620]
下载并导入Oracle的公钥:
[[email protected] tmp] wget https://www.virtualbox.org/download/oracle_vbox.asc
--2020-02-25 08:27:50-- https://www.virtualbox.org/download/oracle_vbox.asc
Resolving www.virtualbox.org (www.virtualbox.org)... 137.254.60.32
Connecting to www.virtualbox.org (www.virtualbox.org)|137.254.60.32|:443... connected.
HTTP request sent, awaiting response... 200 OK
Length: 1734 (1.7K) [text/plain]
Saving to: 'oracle_vbox.asc'
100%[==============================================================>] 1,734 --.-K/s in 0.05s

2020-02-25 08:27:50 (34.9 KB/s) - 'oracle_vbox.asc' saved [1734/1734]

# rpm --import oracle_vbox.asc
[[email protected] tmp]# # rpm --checksig VirtualBox-6.1-6.1.4_136177_el7-1.x86_64.rpm
VirtualBox-6.1-6.1.4_136177_el7-1.x86_64.rpm: (sha1) dsa sha1 md5 gpg OK
安装 VirtualBox 使用以下命令。
[[email protected] tmp] yum localinstall VirtualBox-6.1-6.1.4_136177_el7-1.x86_64.rpm
Loaded plugins: fastestmirror, priorities, universal-hooks
Examining VirtualBox-6.1-6.1.4_136177_el7-1.x86_64.rpm: VirtualBox-6.1-6.1.4_136177_el7-1.x86_64
Marking VirtualBox-6.1-6.1.4_136177_el7-1.x86_64.rpm to be installed
Resolving Dependencies
--> Running transaction check
---> Package VirtualBox-6.1.x86_64 0:6.1.4_136177_el7-1 will be installed
--> Processing Dependency: libSDL-1.2.so.0()(64bit) for package: VirtualBox-6.1-6.1.4_136177_el7-1.x86_64
Loading mirror speeds from cached hostfile
* EA4: 208.100.0.204
* cpanel-addons-production-feed: 208.100.0.204
* cpanel-plugins: 208.100.0.204
* epel: mirrors.CodePre.com
170 packages excluded due to repository priority protections
--> Processing Dependency: libopus.so.0()(64bit) for package: VirtualBox-6.1-6.1.4_136177_el7-1.x86_64
--> Running transaction check
---> Package SDL.x86_64 0:1.2.15-15.el7_7 will be installed
---> Package opus.x86_64 0:1.0.2-6.el7 will be installed
--> Finished Dependency Resolution
Dependencies Resolved

===================================================================== Package Arch Version Repository Size =====================================================================Installing:
VirtualBox-6.1 x86_64 6.1.4_136177_el7-1 /VirtualBox-6.1-6.1.4_136177_el7-1.x86_64 221 M Installing for dependencies:
SDL x86_64 1.2.15-15.el7_7 system-updates-released 205 k opus x86_64 1.0.2-6.el7 system-base 630 k

Transaction Summary
=====================================================================Install 1 Package (+2 Dependent packages)

Total size: 222 M
Total download size: 835 k
Installed size: 223 M
Is this ok [y/d/N]: y
Downloading packages:
(1/2): opus-1.0.2-6.el7.x86_64.rpm | 630 kB 00:00:00
(2/2): SDL-1.2.15-15.el7_7.x86_64.rpm | 205 kB 00:00:00
---------------------------------------------------------------------Total 4.5 MB/s | 835 kB 00:00:00
Running transaction check
Running transaction test
Transaction test succeeded
Running transaction
Installing : SDL-1.2.15-15.el7_7.x86_64 1/3
Installing : opus-1.0.2-6.el7.x86_64 2/3
Installing : VirtualBox-6.1-6.1.4_136177_el7-1.x86_64 3/3

Creating group 'vboxusers'. VM users must be member of that group!

This system is currently not set up to build kernel modules.
Please install the Linux kernel "header" files matching the current kernel
for adding new hardware support to the system.
The distribution packages containing the headers are probably:
kernel-devel kernel-devel-3.10.0-1062.4.1.el7.x86_64
This system is currently not set up to build kernel modules.
Please install the Linux kernel "header" files matching the current kernel
for adding new hardware support to the system.
The distribution packages containing the headers are probably:
kernel-devel kernel-devel-3.10.0-1062.4.1.el7.x86_64

There were problems setting up VirtualBox. To restart the set-up process, run
/sbin/vboxconfig
as root. If your system is using EFI Secure Boot you may need to sign the kernel modules (vboxdrv, vboxnetflt, vboxnetadp, vboxpci) before you can load them. Please see your Linux system's documentation for more information.
Verifying : opus-1.0.2-6.el7.x86_64 1/3
Verifying : SDL-1.2.15-15.el7_7.x86_64 2/3
Verifying : VirtualBox-6.1-6.1.4_136177_el7-1.x86_64 3/3

Installed:
VirtualBox-6.1.x86_64 0:6.1.4_136177_el7-1

Dependency Installed:
SDL.x86_64 0:1.2.15-15.el7_7 opus.x86_64 0:1.0.2-6.el7

Complete!
如果一切顺利,我们应该可以使用以下命令检查版本。
[[email protected] tmp]# VBoxManage --version
6.1.4
如果它返回版本,我们应该很高兴。
macOS 安装
在 MacOS 上安装 Vagrant 非常简单,因此我们将通过所需的步骤使其简单。
MacOS 上的 Vagrant 安装
- 参观 流浪者下载页面 并单击 MacOS 64 位链接以将 .dmg 文件下载到您的工作站。
- 下载后,单击该文件,然后双击 vagrant.pkg 图标。
- 查看安装程序步骤并单击安装开始设置 Vagrant。
VirtualBox 在 MacOS 上安装
和之前的安装一样,我们需要 安装最新的 VirtualBox 从以下链接。
- 下载 VirtualBox .dmg 文件来自上面的链接。
- 双击 VirtualBox.pkg 图标并跟随安装程序。
- 单击安装并等待安装完成。
- 重新启动您的工作站。
现在我们已经探索了 Vagrant 是什么,如何安装它,以及它如何加速我们的开发过程,而不必担心破坏我们的生产站点。 在我们文章的下一部分中,我们将介绍常见的配置文件以及 Vagrant 的用法。
Vagrant 和常用配置文件的使用
在上面 Vagrant 文章的前面部分,我们学习并探索了 Vagrant 是如何安装在各种操作系统版本上的,以及 Vagrant 的一般作用。 在下一节中,我们将更深入地了解其配置文件、如何使用 Vagrant 部署虚拟机以及如何向 Vagrant 添加额外的 VM 提供程序。
Vagrant 常用命令
[[email protected] (Tue Mar 03): /]# vagrant
Usage: vagrant [options] <command> [<args>]

    -v, --version                    Print the version and exit.
    -h, --help                       Print this help.

Common commands:
     box             manages boxes: installation, removal, etc.
     cloud           manages everything related to Vagrant Cloud
     destroy         stops and deletes all traces of the vagrant machine
     global-status   outputs status Vagrant environments for this user
     halt            stops the vagrant machine
     help            shows the help for a subcommand
     init            initializes a new Vagrant environment by creating a Vagrantfile
     login
     package         packages a running vagrant environment into a box
     plugin          manages plugins: install, uninstall, update, etc.
     port            displays information about guest port mappings
     powershell      connects to machine via powershell remoting
     provision       provisions the vagrant machine
     push            deploys code in this environment to a configured destination
     rdp             connects to machine via RDP
     reload          restarts vagrant machine, loads new Vagrantfile configuration
     resume          resume a suspended vagrant machine
     snapshot        manages snapshots: saving, restoring, etc.
     ssh             connects to machine via SSH
     ssh-config      outputs OpenSSH valid configuration to connect to the machine
     status          outputs status of the vagrant machine
     suspend         suspends the machine
     up              starts and provisions the vagrant environment
     upload          upload to machine via communicator
     validate        validates the Vagrantfile
     version         prints current and latest Vagrant version
     winrm           executes commands on a machine via WinRM
     winrm-config    outputs WinRM configuration to connect to the machine

For help on any individual command run `vagrant COMMAND -h`

Additional subcommands are available, but are either more advanced
or not commonly used. To see all subcommands, run the command
`vagrant list-commands`.
现在我们可以看到整个命令结构和各种标志的用途,让我们使用以下命令创建一个名为 LiquidWebVagrant 的新文件夹。
[[email protected] (Tue Mar 03): / ]# mkdir LiquidWebVagrantEnter 以下命令进入新创建的文件夹。
[ [email protected]
 (Tue Mar 03): / ]# cd LiquidWebVagrant/
现在,我们可以使用以下命令启动新的 Vagrant 环境。
[[email protected] (Tue Mar 03): /LiquidWebVagrant ]# vagrant init
A `Vagrantfile` has been placed in this directory. You are now
ready to `vagrant up` your first virtual environment! Please read
the comments in the Vagrantfile as well as documentation on
`vagrantup.com` for more information on using Vagrant.
现在我们已经启动了一个新的 Vagrant 环境,让我们看一下名为 Vagrantfile 的主要 Vagrant 配置文件。
流浪档案审查
Vagrantfile 是最重要的配置文件,就我们可以为我们的开发环境定义的功能而言。 Vagrantfile 使用 Ruby 类型语法,但对文件进行修改不需要了解 Ruby 编程语言。 原始文件看起来像这样。
[[email protected] (Tue Mar 03): /LiquidWebVagrant ]#  cat Vagrantfile
# -*- mode: ruby -*-
# vi: set ft=ruby :

# All Vagrant configuration is done below. The "2" in Vagrant.configure
# configures the configuration version (we support older styles for
# backwards compatibility). Please don't change it unless you know what
# you're doing.
Vagrant.configure("2") do |config|

  # The most common configuration options are documented and commented below.
  # For a complete reference, please see the online documentation at
  # https://docs.vagrantup.com.

  # Every Vagrant development environment requires a box. You can search for
  # boxes at https://vagrantcloud.com/search.
  config.vm.box = "base"

  # Disable automatic box update checking. If you disable this, then
  # boxes will only be checked for updates when the user runs
  # `vagrant box outdated`. This is not recommended.
  # config.vm.box_check_update = false

  # Create a forwarded port mapping which allows access to a specific port
  # within the machine from a port on the host machine. In the example below,
  # accessing "localhost:8080" will access port 80 on the guest machine.
  # NOTE: This will enable public access to the opened port
  # config.vm.network "forwarded_port", guest: 80, host: 8080

  # Create a forwarded port mapping which allows access to a specific port
  # within the machine from a port on the host machine and only allow access
  # via 127.0.0.1 to disable public access
  # config.vm.network "forwarded_port", guest: 80, host: 8080, host_ip: "127.0.0.1"

  # Create a private network, which allows host-only access to the machine
  # using a specific IP.
  # config.vm.network "private_network", ip: "192.168.33.10"

  # Create a public network, which generally matched to bridged network.
  # Bridged networks make the machine appear as another physical device on
  # your network.
  # config.vm.network "public_network"

  # Share an additional folder to the guest VM. The first argument is
  # the path on the host to the actual folder. The second argument is
  # the path on the guest to mount the folder. And the optional third
  # argument is a set of non-required options.
  # config.vm.synced_folder "../data", "/vagrant_data"

########## Configuration of various options for VM’s providers ##########

  # Provider-specific configuration so you can fine-tune various
  # backing providers for Vagrant. These expose provider-specific options.
  # Example for VirtualBox:
  #
  # config.vm.provider "virtualbox" do |vb|
  #   # Display the VirtualBox GUI when booting the machine
  #   vb.gui = true
  #
  #   # Customize the amount of memory on the VM:
  #   vb.memory = "1024"
  # end
  #
  # View the documentation for the provider you are using for more
  # information on available options.

  # Enable provisioning with a shell script. Additional provisioners such as
  # Puppet, Chef, Ansible, Salt, and Docker are also available. Please see the
  # documentation for more information about their specific syntax and use.
  # config.vm.provision "shell", inline: <<-SHELL
  #   apt-get update
  #   apt-get install -y apache2
  # SHELL
end
使用预定义的 LAMP 堆栈部署简单的 Vagrant CentOS 7 服务器
现在我们看到了一个基本的 Vagrantfile 是如何出现的,就像我们可以开始部署我们的 流浪虚拟机. 在这一部分,我们将使用 CentOS 7 LAMP 堆栈服务器,它可以从前面的链接中获得。
- 访问上面的链接以下载 vagrant 文件。
- 创建一个目录(使用以下命令),其中将使用 vagrant 容器。
[ [email protected] (Tue Mar 03): / ]# mkdir LiquidWebVagrant
[ [email protected] (Tue Mar 03): / ]# cd LiquidWebVagrant
[ [email protected] (Tue Mar 03): /LiquidWebVagrant ]#
使用以下命令从上面的链接启动 vagrant 文件。
[[email protected] (Tue Mar 03): /LiquidWebVagrant ]# vagrant init Gigasavvy/centos7-LAMP
A `Vagrantfile` has been placed in this directory. You are now
ready to `vagrant up` your first virtual environment! Please read
the comments in the Vagrantfile as well as documentation on
`vagrantup.com` for more information on using Vagrant.
接下来,我们可以使用以下命令启动 Vagrant。
[[email protected] (Tue Mar 03): /LiquidWebVagrant ]# vagrant up
Bringing machine 'default' up with 'virtualbox' provider...
==> default: Importing base box 'Gigasavvy/centos7-LAMP'...
==> default: Matching MAC address for NAT networking...
==> default: Checking if box 'Gigasavvy/centos7-LAMP' version '0.0.7' is up to date...
==> default: Setting the name of the VM: LiquidWebVagrant_default_1583230821780_30210
==> default: Fixed port collision for 22 => 2222. Now on port 2201.
==> default: Clearing any previously set network interfaces...
==> default: Preparing network interfaces based on configuration...
    default: Adapter 1: nat
==> default: Forwarding ports...
    default: 22 (guest) => 2201 (host) (adapter 1)
==> default: Booting VM...
==> default: Waiting for machine to boot. This may take a few minutes...
    default: SSH address: 127.0.0.1:2201
    default: SSH username: vagrant
    default: SSH auth method: private key
    default: Warning: Connection reset. Retrying...
    default: Warning: Connection aborted. Retrying...
==> default: Machine booted and ready!
==> default: Checking for guest additions in VM...
    default: The guest additions on this VM do not match the installed version of
    default: VirtualBox! In most cases this is fine, but in rare cases it can
    default: prevent things such as shared folders from working properly. If you see
    default: shared folder errors, please make sure the guest additions within the
    default: virtual machine match the version of VirtualBox you have installed on
    default: your host and reload your VM.
    default:
    default: Guest Additions Version: 5.0.14
    default: VirtualBox Version: 6.0
==> default: Mounting shared folders...
如果在安装过程中或运行“vagrant up”后没有发现错误,我们现在可以使用以下命令通过 ssh 连接到我们的机器。
[[email protected] (Tue Mar 03): /LiquidWebVagrant ]# vagrant ssh
Last login: Fri Jun 10 19:39:33 2016 from gateway
[[email protected] (Tue Mar 03): ~ ]$
接下来,以root用户身份输入(密码为vagrant)。
[[email protected] (Tue Mar 03): ~ ]$ su root
Password:
由于此服务器带有预编译的 LAMP 堆栈,让我们检查一下预装的软件是否按预期工作。
检查PHP版本
[ [email protected] (Tue Mar 03): /home/vagrant ]# php -v
PHP 7.0.7 (cli) (built: May 28 2016 07:53:22) ( NTS )
Copyright (c) 1997-2016 The PHP Group
Zend Engine v3.0.0, Copyright (c) 1998-2016 Zend Technologies
检查 Apache 地位
[ [email protected] (Tue Mar 03): /home/vagrant ]# systemctl status httpd
● httpd.service - The Apache HTTP Server
   Loaded: loaded (/usr/lib/systemd/system/httpd.service; enabled; vendor preset: disabled)
   Active: active (running) since Tue 2020-03-03 05:20:50 EST; 9min ago
     Docs: man:httpd(8)
           man:apachectl(8)
 Main PID: 909 (httpd)
   Status: "Total requests: 0; Current requests/sec: 0; Current traffic:   0 B/sec"
   CGroup: /system.slice/httpd.service
           ├─ 909 /usr/sbin/httpd -DFOREGROUND
           ├─1148 /usr/sbin/httpd -DFOREGROUND
           ├─1235 /usr/sbin/httpd -DFOREGROUND
           ├─1236 /usr/sbin/httpd -DFOREGROUND
           ├─1237 /usr/sbin/httpd -DFOREGROUND
           ├─1241 /usr/sbin/httpd -DFOREGROUND
           └─1242 /usr/sbin/httpd -DFOREGROUND

Mar 03 05:20:48 localhost.localdomain systemd[1]: Starting The Apache HTTP Server...
Mar 03 05:20:50 localhost.localdomain systemd[1]: Started The Apache HTTP Server.
检查 MySQL 状态
[ [email protected] (Tue Mar 03): /home/vagrant ]# systemctl status mysql
● mariadb.service - MariaDB database server
   Loaded: loaded (/usr/lib/systemd/system/mariadb.service; enabled; vendor preset: disabled)
  Drop-In: /etc/systemd/system/mariadb.service.d
           └─migrated-from-my.cnf-settings.conf
   Active: active (running) since Tue 2020-03-03 05:20:50 EST; 10min ago
 Main PID: 906 (mysqld)
   Status: "Taking your SQL requests now..."
   CGroup: /system.slice/mariadb.service
           └─906 /usr/sbin/mysqld

Mar 03 05:20:49 localhost.localdomain mysqld[906]: 2020-03-03  5:20:49 140717048424576 [Note] InnoDB: Highest supported file format is Barracuda.
Mar 03 05:20:49 localhost.localdomain mysqld[906]: 2020-03-03  5:20:49 140717048424576 [Note] InnoDB: 128 rollback segment(s) are active.
Mar 03 05:20:49 localhost.localdomain mysqld[906]: 2020-03-03  5:20:49 140717048424576 [Note] InnoDB: Waiting for purge to start
Mar 03 05:20:49 localhost.localdomain mysqld[906]: 2020-03-03  5:20:49 140717048424576 [Note] InnoDB:  Percona XtraDB (https://www.percona.com) 5.6.29-76.2 started; log sequence number 1617055
Mar 03 05:20:49 localhost.localdomain mysqld[906]: 2020-03-03  5:20:49 140717048424576 [Note] Plugin 'FEEDBACK' is disabled.
Mar 03 05:20:49 localhost.localdomain mysqld[906]: 2020-03-03  5:20:49 140716315473664 [Note] InnoDB: Dumping buffer pool(s) not yet started
Mar 03 05:20:50 localhost.localdomain mysqld[906]: 2020-03-03  5:20:50 140717048424576 [Note] Server socket created on IP: '::'.
Mar 03 05:20:50 localhost.localdomain mysqld[906]: 2020-03-03  5:20:50 140717048424576 [Note] /usr/sbin/mysqld: ready for connections.
Mar 03 05:20:50 localhost.localdomain mysqld[906]: Version: '10.1.14-MariaDB'  socket: '/var/lib/mysql/mysql.sock'  port: 3306  MariaDB Server
Mar 03 05:20:50 localhost.localdomain systemd[1]: Started MariaDB database server.
我们可以看到我们所有的 LAMP 堆栈软件都可以运行,因此我们现在可以开始开发我们的 Web 应用程序。
向 Vagrant 添加额外的提供者
Vagrant 为 Docker 提供默认支持, VirtualBox, 和 Hyper-V。 它还可以管理不同类型的虚拟机。 这是通过在 Vagrant 中使用其他提供程序来完成的。 在本节中,我们将添加 docker 作为提供者。
您还可以访问此页面以获得更明确的视图 如何使用码头工人 在这个设置中。 键入此命令以开始。
[[email protected] (Tue Mar 03): /home/vagrant ] vagrant plugin install docker
Installing the 'docker' plugin. This can take a few minutes...
Fetching: backticks-1.0.2.gem (100%)
Fetching: docker-0.4.0.gem (100%)
Installed the plugin 'docker (0.4.0)'!
这会将 Docker 作为插件安装,现在,我们可以使用 docker 命令。
[[email protected] LiquidWebVagrant]# vagrant list-commands | grep docker
docker-exec     attach to an already-running docker container
docker-logs     outputs the logs from the Docker container
docker-run      run a one-off command in the context of a container
请记住,这只是 Vagrant 可用的众多插件之一。 提醒一下,插件不会在我们的系统上安装完整的软件本身。
有关于 Vagrant 的问题? 给我们打电话 800.580.4985,或打开一个 聊天 或立即与我们联系,与我们知识渊博的解决方案团队之一或经验丰富的托管顾问交谈!
[ad_2]