[ad_1]
吨NVIDIA Linux 专有的统一驱动程序支持各种功能,例如 3d 渲染、opengl 等等。 这篇文章介绍了在 Debian Linux 版本 6.x amd64 中安装和配置 NVIDIA 的专有显卡驱动程序。
为什么要使用专有的 Unix 驱动程序?
您将获得完整的 3D 加速支持。 这允许您在 Linux 下使用以下具有 3D 和 OpenGL 的应用程序:
- PlanetPenguin Racer、Extreme Tux Racer、Neverball 等游戏。
- Linux 视频编辑应用程序,例如cinelerra 等。
- 使用 compiz 提供的 3d 桌面效果——X Window 系统的合成窗口管理器。 它使用 3D 图形硬件为窗口管理创建快速合成桌面效果。
让我们看看,如何在 Debian Linux 中安装 NVIDIA 驱动程序。
第 1 步:在 Debian 上为 Nvidia 安装编译器和所需工具
首先,安装 build-essential 和 kernel headers 包:# apt-get install build-essential linux-headers-$(uname -r)
第 2 步:在 Debian 上禁用 nouveau 驱动程序
NVIDIA 硬件的开源驱动程序包含在标准 Linux 发行版中。 您需要禁用 nouveau 驱动程序。 创建如下文件 disable-nouveau.conf:# vi /etc/modprobe.d/disable-nouveau.conf
附加以下代码:
# Disable nouveau
blacklist nouveau
options nouveau modeset=0
Save 和 close 文件。
第 3 步:下载适用于 Debian Linux 的 nvidia 驱动程序
访问 这个页面要抓取 最新版本的 nvidia 驱动程序(将其保存在您的 $HOME 中:$ wget -O NVIDIA-Linux-x86_64-295.59.run https://in.download.nvidia.com/XFree86/Linux-x86_64/295.59/NVIDIA-Linux-x86_64-295.59.run
示例输出:
--2012-07-17 18:49:52--  https://in.download.nvidia.com/XFree86/Linux-x86_64/295.59/NVIDIA-Linux-x86_64-295.59.run
Resolving in.download.nvidia.com... 122.178.225.56, 122.178.225.32
Connecting to in.download.nvidia.com|122.178.225.56|:80... connected.
HTTP request sent, awaiting response... 200 OK
Length: 58529480 (56M) [application/octet-stream]
Saving to: `/home/vivek/NVIDIA-Linux-x86_64-295.59.run'

 0% [                                                                                     ] 5,03,684     459K/s
步骤#4:重新启动系统
您需要使用 reboot 命令重启系统并使用单用户模式登录或在 grub 提示符下选择恢复模式:# reboot
登录到单用户模式后,如果使用 apt 命令/apt-get 命令安装,请删除以下软件包:# apt-get --purge remove xserver-xorg-video-nouveau nvidia-kernel-common nvidia-kernel-dkms nvidia-glx nvidia-smi
搜索所有已安装的 nvidia 软件包并使用 dpkg 命令将其删除(不要跳过此步骤):# dpkg --list | grep -i --color nvidia
第 4 步:在 Debian Linux 上安装 NVIDIA 驱动程序
确保您没有使用 Xorg 和/或任何其他图形环境,例如 Gnome 或 KDE。 如果您正在运行 Gnome,请按如下方式停止它:# /etc/init.d/gdm3 stop
还可以使用 cp 命令备份现有的 /etc/X11/xorg.conf 文件:# cp -v /etc/X11/xorg.{conf,factory}
键入以下命令以安装 Unix 驱动程序:# sh /home/vivek/NVIDIA-Linux-x86_64-295.59.run
只需按照屏幕上的说明进行操作。 确保升级时升级 xorg.conf。 最后,重启系统:# reboot
如何使用 NVIDIA 驱动程序配置 Xorg?
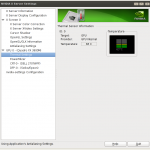
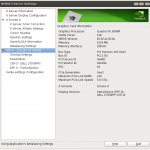
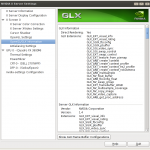
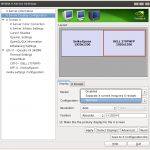
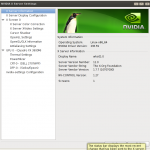
登录 Gnome 或 KDE destktop 并键入以下 nvidia-settings 命令:$ nvidia-settings
或访问 Gnome 菜单,如下所示:System > Preferences > NVIDIA X Server Settings
示例输出:
关于基于 Debian 软件包的驱动程序安装的说明
可以使用 NVIDIA 的官方安装程序或 Debian 驱动程序包安装 NVIDIA 驱动程序。 这篇文章涵盖了 NVIDIA 的官方安装程序。 但是,您可以按照描述的 Debian 驱动程序包方法 这里.
我修改的 xorg.conf
以下是我的 /etc/X11/xorg.conf:
Section "ServerLayout"
    Identifier     "Layout0"
    Screen      0  "Screen0" 0 0
    InputDevice    "Keyboard0" "CoreKeyboard"
    InputDevice    "Mouse0" "CorePointer"
    Option         "Xinerama" "0"
EndSection

Section "Files"
EndSection

Section "InputDevice"
    # generated from default
    Identifier     "Mouse0"
    Driver         "mouse"
    Option         "Protocol" "auto"
    Option         "Device" "/dev/psaux"
    Option         "Emulate3Buttons" "no"
    Option         "ZAxisMapping" "4 5"
EndSection

Section "InputDevice"
    # generated from default
    Identifier     "Keyboard0"
    Driver         "kbd"
EndSection

Section "Monitor"
    # HorizSync source: edid, VertRefresh source: edid
    Identifier     "Monitor0"
    VendorName     "Unknown"
    ModelName      "Seiko/Epson"
    HorizSync       49.8 - 74.7
    VertRefresh     40.0 - 60.0
    Option         "DPMS"
EndSection

Section "Device"
    Identifier     "Device0"
    Driver         "nvidia"
    VendorName     "NVIDIA Corporation"
    BoardName      "Quadro FX 3800M"

    # Power settings by VG - start
    # Laptop Battery life setting by VG
    Option     "RegistryDwords" "PowerMizerLevel=0x3"
    # When on AC settings by VG
    Option "RegistryDwords" "PowerMizerLevelAC=0x3"
    # Power settings by VG - end

    #Compiz settings by VG - start
    Option "XAANoOffscreenPixmaps" "true"
    Option "AllowGLXWithComposite" "true"
    #Compiz settings by VG - end
EndSection

Section "Screen"
    Identifier     "Screen0"
    Device         "Device0"
    Monitor        "Monitor0"
    DefaultDepth    24
    Option         "TwinView" "1"
    Option         "TwinViewXineramaInfoOrder" "CRT-0"
    Option         "metamodes" "DFP: nvidia-auto-select +0+0, CRT: nvidia-auto-select +1920+0"
    #Compiz settings by VG - start - we need to set this to 24bit
    SubSection     "Display"
        Depth       24
    EndSubSection
    #Compiz settings by VG - end
    #Compiz settings by VG - start
    Option "AddARGBGLXVisuals" "true"
    #Compiz settings by VG - end
EndSection

# Dedicated "Extensions" section
Section "Extensions"
        #Compiz settings by VG - start
        Option "Composite" "enable"
        #Compiz settings by VG - end
EndSection
加起来
使用 人命令man xorg.conf
参考:
请参阅以下网址:
- 英伟达 Unix 驱动程序 下载页面。
- Debian Linux 主页。
[ad_2]