[ad_1]
本指南将带您了解如何在 Rocky Linux 8 上安装 Redmine。Redmine 是一个跨平台和跨数据库的灵活项目管理 Web 应用程序。
Redmine 具有许多在 Redmine 功能页面上描述的功能。
在 Rocky Linux 8 上安装 Redmine
创建 Redmine 系统用户
在本指南中,我们将安装 Redmine /opt/redmine 目录并以非特权 redmine 系统用户身份运行它。
因此,创建一个 redmine 系统用户 (或 Redmine 将在这种情况下运行的任何其他非特权系统用户) 并分配 /opt/redmine 作为它的主目录。
useradd -r -m -d /opt/redmine redmine
咨询 man useradd 了解上面使用的选项的含义。
安装 Apache HTTP服务器
安装 Apache Rocky Linux 8 上的 HTTP 服务器,只需执行;
dnf install httpd
启动并启用 Apache 在系统启动时运行的 HTTP 服务器;
systemctl enable httpd --now
接下来,由于我们将使用 Apache 作为我们的 HTTP 服务器,添加 Apache 到 Redmine 组。
usermod -aG redmine apache
安装 MariaDB 数据库后端
Redmine 支持多种数据库后端,例如 PostgreSQL、MySQL/MariaDB、MSSQL。 在这个演示中,我们使用的是 MariaDB 10.5。
按照以下链接安装 MariaDB Rocky Linux 8。
在 Rocky Linux 8 上安装 MariaDB 10.x
创建 Redmine 数据库和数据库用户
安装数据库后端后,登录并为 Redmine 创建数据库和数据库用户。 相应地替换数据库名称。
mysql -u root -p
create database redminedb;
创建并授予用户对所创建数据库的所有权限。 相应地替换数据库用户和密码.
grant all on redminedb.* to [email protected] identified by '[email protected]';
重新加载权限表并退出。
flush privileges;
quit
在 Rocky Linux 8 上下载并安装 Redmine
安装所需的依赖项
首先安装构建 Redmine 所需的依赖项。 首先安装 EPEL 并启用 PowerTools 存储库。
dnf install epel-release -y
dnf config-manager --set-enabled powertools
接下来,继续安装依赖项。
dnf install ruby-devel rpm-build wget libxml2-devel vim make openssl-devel automake libtool ImageMagick ImageMagick-devel MariaDB-devel gcc httpd-devel libcurl-devel gcc-c++ -y
在 Rocky Linux 8 上安装 Ruby
Redmine 还需要 Ruby 解释器,可以通过执行命令安装;
dnf install ruby -y
请注意,Redmine 4.2 版支持 Ruby 2.4、2.5、2.6、2.7。
验证安装的版本。
ruby -v
ruby 2.5.9p229 (2021-04-05 revision 67939) [x86_64-linux]下载并安装 Redmine
为了安装最新版本的 Redmine,导航到下载页面并获取最新的稳定版本。
在撰写本文时,您可以简单地使用 wget 命令来提取最新的 Redmine tarball,版本 4.2.2。
wget https://www.redmine.org/releases/redmine-4.2.2.tar.gz -P /tmp
下载完成后,将 Redmine tarball 解压缩到 Redmine 用户的主目录。
sudo -u redmine tar xzf /tmp/redmine-4.2.2.tar.gz -C /opt/redmine/ --strip-components=1
您现在应该在下面有 redmine 文件 /选择/redmine.
ls /opt/redmine
配置 Redmine 数据库连接设置
首先切换到Redmine的用户账户。
su - redmine
重命名示例 Redmine 配置。
cp config/configuration.yml{.example,}
重命名 public 文件夹下的示例调度 CGI 配置文件,如下所示;
cp public/dispatch.fcgi{.example,}
将示例重命名为数据库配置文件。
cp config/database.yml{.example,}
接下来,打开数据库配置文件进行编辑并配置它以设置 Redmine 数据库连接详细信息。
vim config/database.yml
相应地替换数据库名称、数据库用户和密码。
...
production:
  adapter: mysql2
  database: redminedb
  host: localhost
  username: redmineadmin
  password: "[email protected]"
  # Use "utf8" instead of "utfmb4" for MySQL prior to 5.7.7
  encoding: utf8mb4
...
Save 并退出文件。
安装 Ruby 依赖项
接下来,安装所需的 Ruby 依赖项。 请注意,此步骤应以上面创建的 Redmine 用户身份执行。 如果您仍以 Redmine 用户身份登录,请继续。 否则,切换到 redmine 用户。
su - redmine
安装 Bundler 以管理 gem 依赖项。
gem install bundler捆绑程序安装完成后,您现在可以安装所需的 gems 依赖项。
bundle config set --local without 'development test'
bundle install
生成秘密会话令牌
为了防止对存储会话数据的 cookie 进行调整,您需要生成一个随机密钥,Rails 使用该密钥对它们进行编码。
bundle exec rake generate_secret_token
创建数据库架构对象
通过运行以下命令创建 Rails 数据库结构;
RAILS_ENV=production bundle exec rake db:migrate
数据库迁移完成后,通过执行将默认配置数据插入数据库;
RAILS_ENV=production REDMINE_LANG=en bundle exec rake redmine:load_default_data
配置文件系统权限
确保以下目录在 Redmine 目录中可用, /opt/redmine。
- tmp 和 tmp/pdf
- 公共和公共/plugin_assets
- 日志
- 档案
如果它们不存在,只需创建它们并确保它们归用于运行 Redmine 的用户所有。
for i in tmp tmp/pdf public/plugin_assets; do [ -d $i ] || mkdir -p $i; done
chown -R redmine:redmine files log tmp public/plugin_assets
chmod -R 755 /opt/redmine/
测试 Redmine 安装
在 Rocky Linux 8 上安装 Redmine 现已完成。 您可以通过执行以下命令使用 WEBrick 测试 Redmine;
在仍以 redmine 用户身份登录的情况下,运行以下命令。
bundle exec rails server webrick -e production
=> Booting WEBrick
=> Rails 5.2.6 application starting in production on https://0.0.0.0:3000
=> Run `rails server -h` for more startup options
[2021-08-10 22:20:59] INFO  WEBrick 1.4.2.1
[2021-08-10 22:20:59] INFO  ruby 2.5.9 (2021-04-05) [x86_64-linux]
[2021-08-10 22:20:59] INFO  WEBrick::HTTPServer#start: pid=32550 port=3000
您现在可以使用地址通过浏览器访问Redmine, https://Server-IP:3000/.
在此之前,请在 firewalld 上打开端口 3000/tcp。 以特权用户身份运行以下命令。
firewall-cmd --add-port=3000/tcp --permanent
firewall-cmd --reload
打开端口后,导航到浏览器并访问 Redmine。 您应该会看到一个欢迎页面。
点击 登入 并使用凭据:
- 用户:
admin - 密码:
admin
配置 Apache 用于Redmine
一旦您确认Redmine在测试后工作正常,您需要配置 Apache Redmine 的 HTTP 服务器。
安装 Apache 乘客(mod_rails)
Phusion Passenger 是一个 Web 应用程序服务器,可用于在生产环境中为 Redmine 提供服务。
因此,切换到上面创建的 Redmine 用户来安装 Phusion Passenger Apache 模块;
su - redmine
gem install passenger --no-rdoc --no-ri
接下来,安装乘客 Apache 模块。 相应地更换乘客的版本。
passenger-install-apache2-module
按照安装指南安装 Phusion Passenger。
当提示选择语言时,选择 Ruby 并按 Enter.
您也可以从 RPM 存储库安装 Phusion Passenger,但在撰写本文时,找不到任何提供它的存储库。
模块编译完成后,您将了解如何配置模块 Apache,
--------------------------------------------
Almost there!

Please edit your Apache configuration file, and add these lines:

   LoadModule passenger_module /opt/redmine/.gem/ruby/gems/passenger-6.0.10/buildout/apache2/mod_passenger.so
   <IfModule mod_passenger.c>
     PassengerRoot /opt/redmine/.gem/ruby/gems/passenger-6.0.10
     PassengerDefaultRuby /usr/bin/ruby
   </IfModule>

After you restart Apache, you are ready to deploy any number of web
applications on Apache, with a minimum amount of configuration!

Press ENTER when you are done editing.
在你按下之前 Enter 要完成模块安装和设置,请以特权用户身份打开一个新的登录会话并编辑 Apache 配置文件。
在本指南中,我们创建了一个专门的乘客 Apache 模块配置文件为;
echo "LoadModule passenger_module /opt/redmine/.gem/ruby/gems/passenger-6.0.10/buildout/apache2/mod_passenger.so" > /etc/httpd/conf.modules.d/00-passenger.conf
创建 Apache Redmine 的虚拟主机配置,内容如下。 相应地替换服务器名称。 如果需要,您也可以更改默认端口。
cat > /etc/httpd/conf.d/redmine.conf << 'EOL'
Listen 3000
<IfModule mod_passenger.c>
  PassengerRoot /opt/redmine/.gem/ruby/gems/passenger-6.0.10
  PassengerDefaultRuby /usr/bin/ruby
</IfModule>
<VirtualHost *:3000>
    ServerName redmine.kifarunix-demo.com
    DocumentRoot "/opt/redmine/public"

    CustomLog logs/redmine_access.log combined
    ErrorLog logs/redmine_error_log
    LogLevel warn

    <Directory "/opt/redmine/public">
        Options Indexes ExecCGI FollowSymLinks
        Require all granted
        AllowOverride all
    </Directory>
</VirtualHost>
EOL
核实 Apache 配置语法。
httpd -t
Syntax OK
接下来,按 ENTER 完成乘客模块安装。
--------------------------------------------

Validating installation...

 * Checking whether this Passenger install is in PATH... (!)

   Please add /opt/redmine/.gem/ruby/gems/passenger-6.0.10/bin to PATH.
   Otherwise you will get "command not found" errors upon running
   any Passenger commands.

   Learn more at about PATH at:

     https://www.phusionpassenger.com/library/indepth/environment_variables.html#the-path-environment-variable

 * Checking whether there are no other Passenger installations... (!)

   You are currently validating against Phusion Passenger(R) 6.0.10, located in:

     /opt/redmine/.gem/ruby/gems/passenger-6.0.10/bin/passenger

   Besides this Passenger installation, the following other
   Passenger installations have also been detected:

     /opt/redmine/bin/passenger

   Please uninstall these other Passenger installations to avoid
   confusion or conflicts.

 * Checking whether Apache is installed... ✓
 * Checking whether the Passenger module is correctly configured in Apache... ✓

Detected 0 error(s), 2 warning(s).
Press ENTER to continue.
一旦安装和设置 Apache 乘客模块完成,重启 Apache
systemctl restart httpd
检查端口 3000 上是否有任何内容正在侦听。
lsof -i :3000
COMMAND   PID   USER   FD   TYPE DEVICE SIZE/OFF NODE NAME
httpd   17410   root    8u  IPv6  37210      0t0  TCP *:hbci (LISTEN)
httpd   17450 apache    8u  IPv6  37210      0t0  TCP *:hbci (LISTEN)
httpd   17451 apache    8u  IPv6  37210      0t0  TCP *:hbci (LISTEN)
httpd   17452 apache    8u  IPv6  37210      0t0  TCP *:hbci (LISTEN)
太棒了。
从浏览器访问 Redmine
由于我们已经在 firewallD 上打开了 3000/tcp 端口,您现在应该可以访问 Redmine Web 界面了。
更换 服务器 IP 或主机名 因此。
https://server-IP-or-Hostname:3000
如果您收到以下错误;
We're sorry, but something went wrong.
The issue has been logged for investigation. Please try again later.
您需要对 SELinux 权限进行排序。
未从存储库安装的 Phusion 乘客不附带 SELinux 策略模块,因此在启用 SELinux 时可能无法正常工作。
为简单起见,只需禁用 SELinux 并重新启动系统,然后在浏览器上再次访问 Redmine。
setenforce 0
sed -i 's/=enforcing/=disabled/' /etc/selinux/config
否则,如果您想保持 SELinux 运行,请为 Phusion 乘客生成一个自定义 SELinux 模块,以防止任何拒绝进入 /var/log/audit/audit.log 并安装它。 例如;
dnf install policycoreutils-python-utils
audit2allow -a -M passenger
该命令生成了一个可以通过运行安装的策略包;
semodule -i passenger.pp
请注意,在本指南中,SELinux 被禁用,我还没有尝试过这种方法。 它可能有效,也可能无效。 祝你好运。
修复 SELinux 问题后,使用登录 Redmine admin 对于用户和密码。
系统会提示您重置密码。 重新设置并继续登录 Redmine Web 界面。
登录后,重置密码并继续在 Rocky Linux 8 上设置您的 Redmine 配置文件。
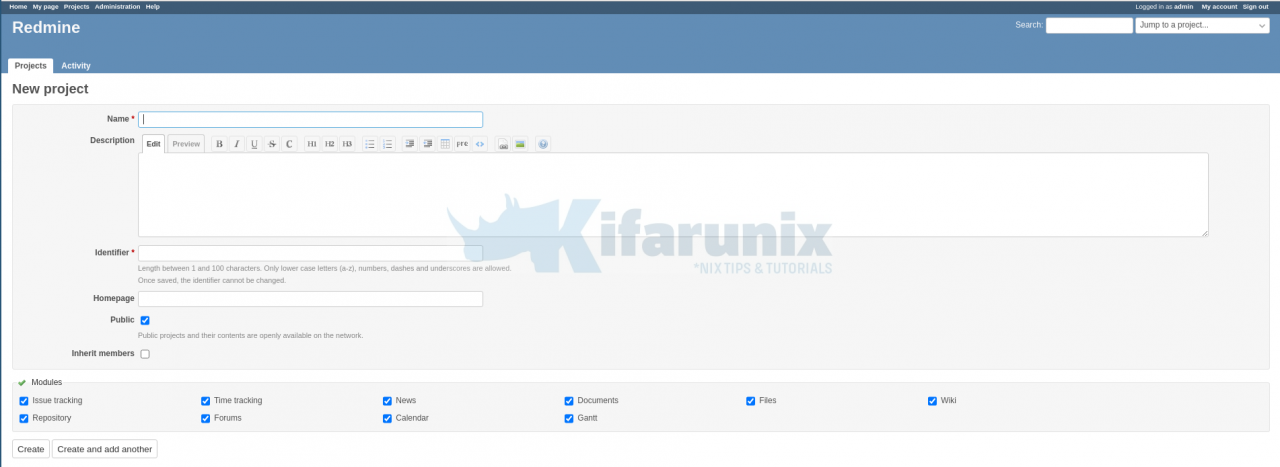
设置好个人资料后,您可以跳转到新项目。
这标志着我们关于如何在 Rocky Linux 8 上安装 Redmine 的指南结束。您现在可以探索这个很棒的工具。
阅读有关如何使用 Redmine 用户指南的更多信息。
参考
Redmine安装
其他 Rocky Linux 教程
在 Rocky Linux 8 上安装 Webmin
在 Rocky Linux 8 上安装和配置 SNMP
安装 Apache Rocky Linux 8 上的 Maven
在 Rocky Linux 8 上安装和配置 NFS 服务器
[ad_2]